Thunder Tiger Decathlon - Construction Article
The Decathlon has been a
staple in the aerobatics world of “Big” aircraft for a long time and has
been used to teach many to gain their aerobatic endorsement on the Private
Pilots License PPL.
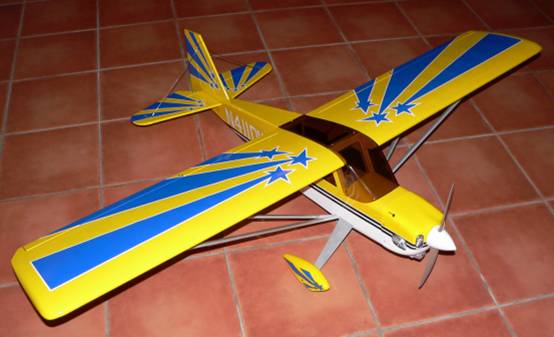
After
ten minutes of struggling with the packaging, there laid out in front of me was
the basis of a Super Decathlon, in a splendid shade of Yellow and Blue.
The fuselage is easily assembled, the instruction are clear and concise, with no errors.
Hardware
The quality of the hardware is pretty good and unless you are really finicky, I could find no reason to change it.
An
OS Max 40FP was installed upfront with a 10.5 x 6 Bolly to start with. The
engine was mounted on the standard engine mounts supplied with the Kit. I did
however dump the engine mounting screws supplied for Dubro Engine Mount Screws,
as these have served me well in the past. I
also installed a Fuel Filter just to make sure the fuel gremlins don’t get me.
After installing the engine the cowl was cut as outlined but the instruction in
the manual.
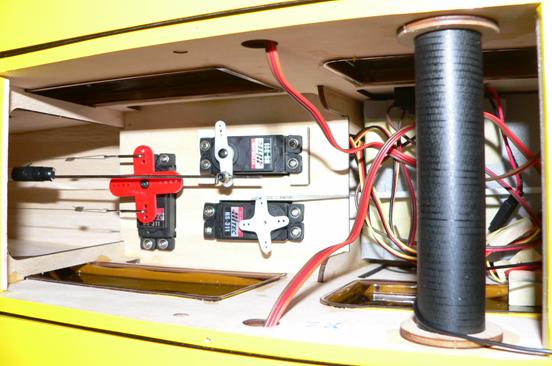
Radio
I
installed a mixture of Hitec Servos, HS422 on the Ailerons and HS311 for the
Rudder, Elevator and Throttle. The reciever was a Hitec Micro 555 5ch and a
1100mah battery pack provided the juice. This was all was controlled by a Hitec
Flash 5 SX Radio.
The Final Setup
The
ailerons are the usual mount the servo in the wing and hook up to the aileron
directly via a wire pushrod and nylon clevis / control horn.
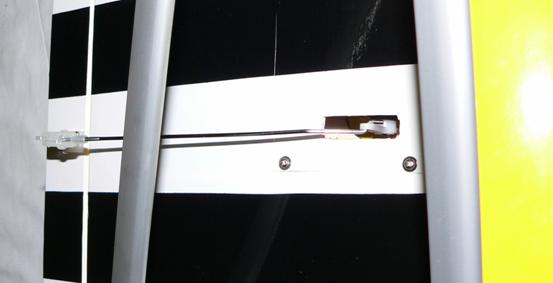
The
elevators are a little different, in that the elevator is two pieces and has a
single pushrod, which is comprised of a long section of hardwood dowel, with a
single piece of piano wire at one end and dual pieces of piano wire at the other
end. The single piece is connected to the servo and the dual pieces are both
individually connected to each half of the elevator.
At the field
So
the day had come to take the Decathlon to the field for its first flight. At the
field it was a little breezy, but a fine, clear day. After getting through the
normal pre-fligth / first flight checks, the Decathlon was lined up on the
runway.
The
take off was a little eventful and it almost did not make it cleanly from the
ground. During the runup roll I applied a little rudder to correct the yaw. What
I thought was a little, it thougth was a lot. Next thing you know I am going
from one side of the runway to the other and it almost ended in tears. Evetually
I got it undercontrol and up into the big blue.
After landing I checked the rudder throws and they were larger than reccomended. I adjusted them back to reccomended setting and lined up again.
Once
airborne, without the theatrics of the previous takeoff,
a few slight adjustments were made to trims, to get it flying straight.
During
this flight I took time to notice the general tracking of the aircraft and its
handing, without doing any heavy aerobatics. In general it handles pretty well,
there is considerable roll coupling with the use of the rudder.
Come
in to land and it just floats, but is quite stable and settles into a nice flare
and then lightly kisses the ground. Taxi back to the pits and have a bit of a
gecko to see how things are, I generally retighten every nut and bolt after the
second flight just to make sure. Nothing was loose and the overall inspection
was good, with one exception, the Wheel Spats.
Stall
Turns, Tail Slides, Humpty Bumps, Cuban Eights, you name it, it does it and all
in a scale manner.
All in all this is a nice looking and flying aircraft. It is a little different to look at than the ever popular Piper Cub, but has similary flight characteristics, just hotter.